INSTRUCTIONS
Building Blockhedz takes some practice, so be patient and make sure you've got the right tools.
These instructions will explain the tools to use and provide some guidance to make building your Blockhedz easier!
TOOLS
Here's the tools that you'll need to make your Blockhedz.
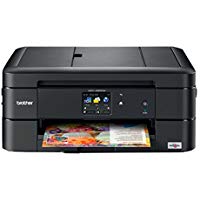 |
Color printer and paper - Any good color printer will work. Make sure you have enough ink/toner to get consistent solid colors.
Normal office paper is fine (get paper that's suitable for your printer of course).
|
 |
Exacto Knife - An exacto knife or any sharp craft knife can be used to make accurate cuts. It's best to use sharp blades since dull blades
tend to tear the paper as you cut. Be careful when using sharp tools!
|
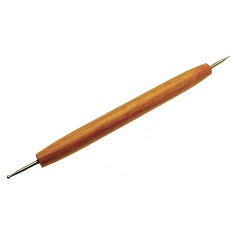 |
Scoring tool - A scoring tool will be used to score fold lines to produce nice, crisp folds. An embossing tool works well for this.
You can also use a 'bone folder tool' or any tool that can create an indention line without cutting or tearing the paper.
|
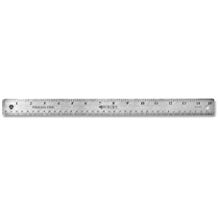 |
Ruler - Use a ruler with your scoring tool to score straight lines to get perfect folds.
A short 6" ruler is best since it's easier to rotate as you work.
|
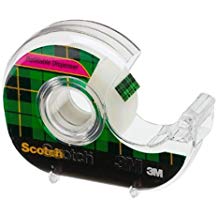 |
Tape - A little bit of tape will be needed to connect a few tricky tabs. Any kind of clear tape will work.
|
 |
Cutting mat (optional) - A self healing cutting mat helps avoid scratching up your table and dulling your blades.
|
Building Your Character
Step 1: Print it out!
Find the Blockhedz character you want to make. Print out the image using 'portrait' layout and choose printer options to minimize the size of the margins.
Normal office paper works fine and it's easy to cut and fold. Once you get the hang of things experiment with other paper options to find what works best for you.
Step 2: Score the fold lines
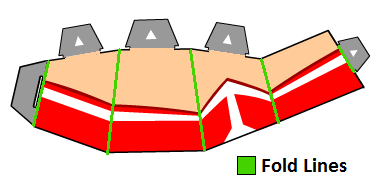
The character is printed out with black lines that indicate fold or cut lines. The black lines on the outer perimiter of each part are cut lines .
The black lines within a part are fold lines (see below for clarification). Use your scoring tool and a ruler to score all the fold lines.
This will make it easier to fold the paper in later steps and produce nice clean folds.
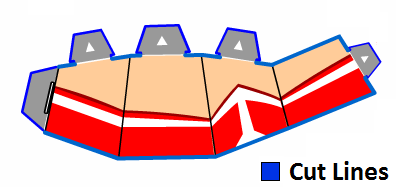
Step 3: Cut the slots
Use your exacto knife to cut all of the slots that are shown as white lines inside of the model. It's easiest to cut these lines now before cutting out the individual pieces of the model.
You might find it helpful to flip your paper over to easily see if you've missed a slot.
Step 4: Separate the parts
Cut out the various parts. At this stage don't worry about cutting perfectly along the borders, just separate the parts without cutting too close to the outlines.
This way it'll be easier to work with each part individually in the next step.
Step 5: Cut out and assemble the parts
- Use your exacto knife to cut the outline of each part. Always move your blade in a direction that gives you comfort and control.
Position and rotate the paper part as needed to suit your cutting direction.
- Assemble each part by folding along score lines and connecting tabs into corresponding slots. Start by assembling the torso and then add legs, arms and finally the head.
- For the torso use a small bits of tape to connect tabs M, N and O. Insert your finger into the 'neck' of the torso to help secure the tabs when applying the tape.
Step 6: Show off your work!
Tweet pictures of your masterpiece to
blockhedz on twitter! It's great to see what you've made!